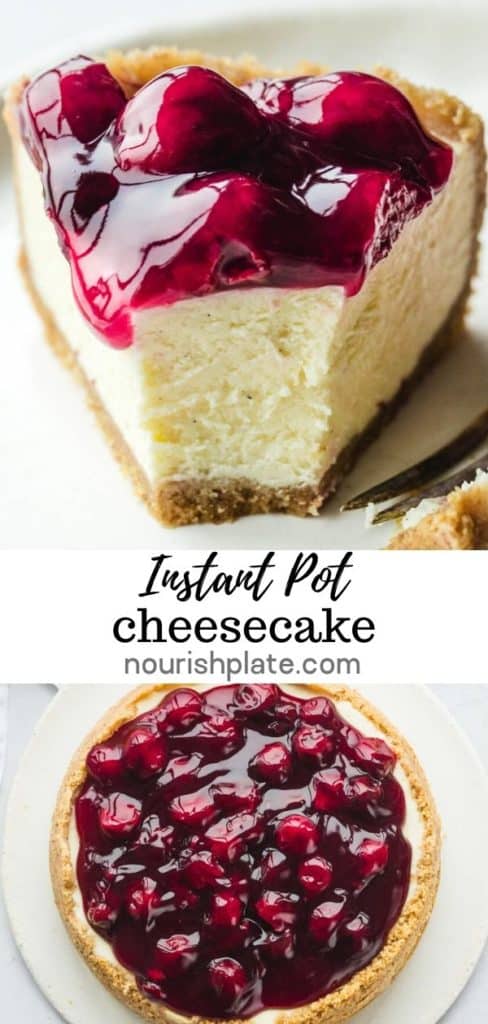
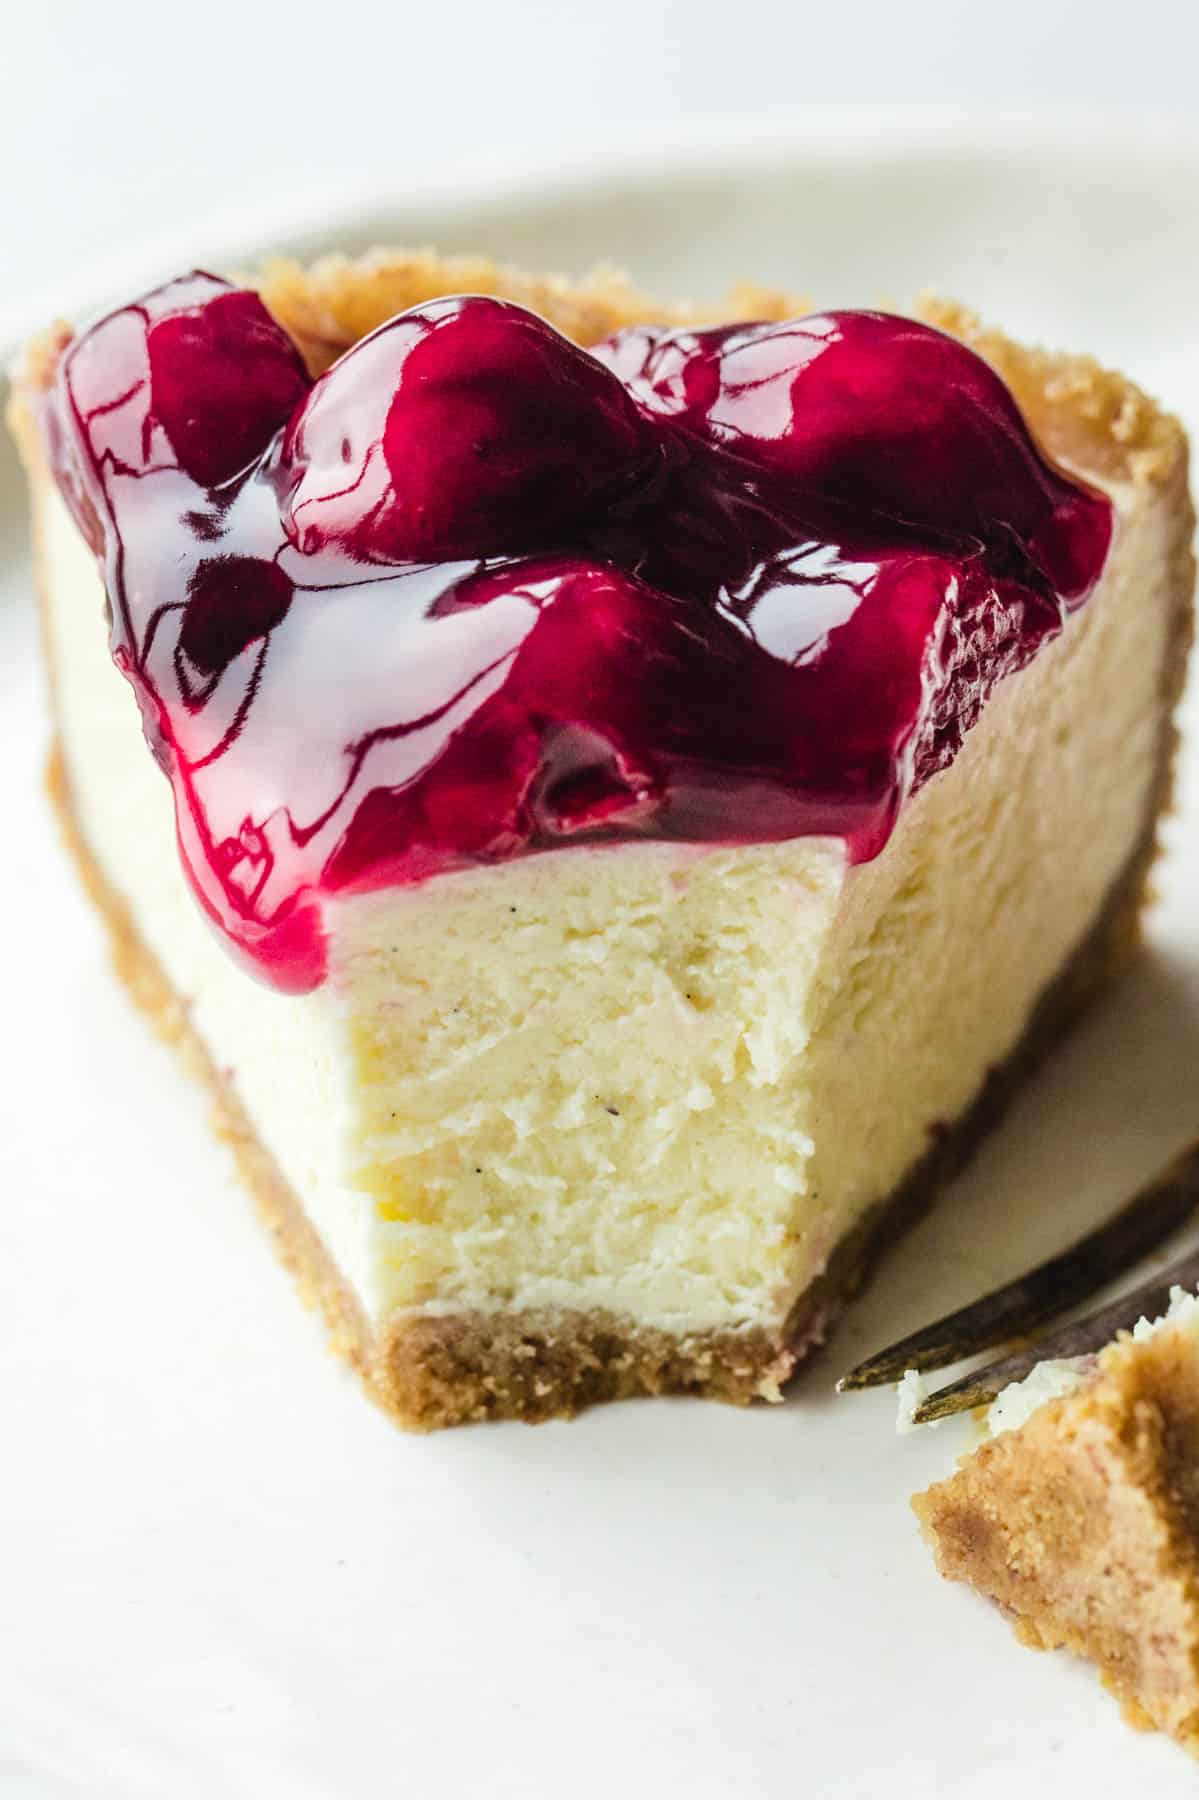
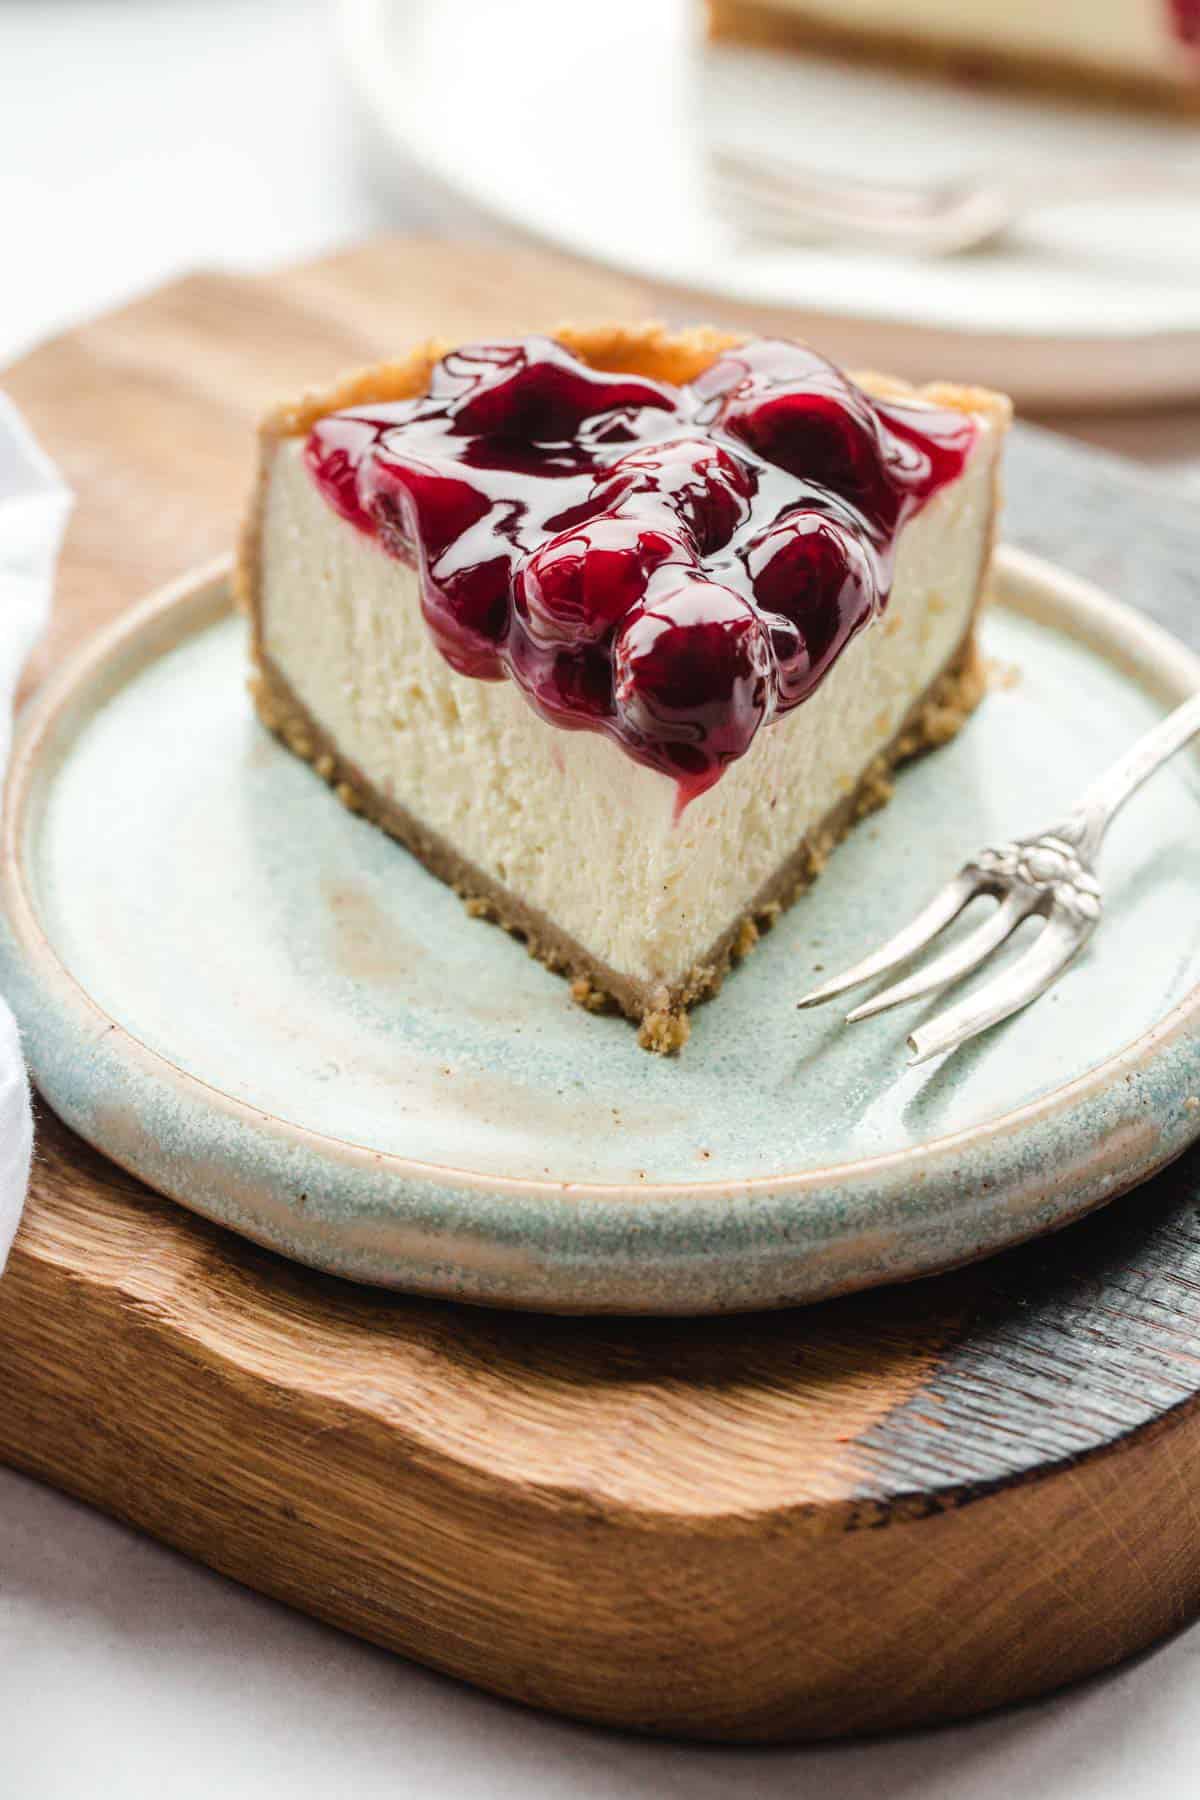
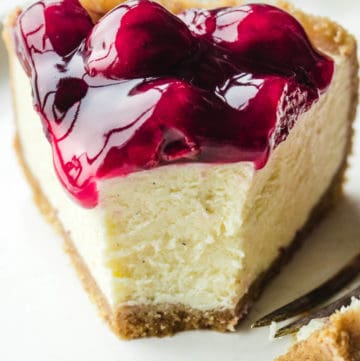
Here’s a very easy to make and incredibly delicious Instant Pot cheesecake with a smooth and creamy texture that melts in your mouth. Top with your favorite fresh fruit, pie filling, or whipped cream. This fail-proof cheesecake recipe will definitely impress everyone!
Do you have guests coming over or you want to impress your family and loved ones? If the answer is yes, then this recipe is for you. This Instant Pot cheesecake is really easy to make, and at the same time, it turns out so pretty and tastes insanely delicious!
It’s also perfect for celebrating a special occasion. Plus, you can change the topping and it will look like a completely different recipe every time you make it.
This cheesecake looks as if I’ve spent hours in the kitchen making it, yep it’s perfect! But the truth is, I whipped it up so quickly, and you can too!
Ingredients
To make this recipe, you will need the following simple ingredients:
Graham cracker crumbs (or digestive biscuits), granulated sugar, unsalted butter, cream cheese, eggs, all-purpose flour, heavy cream, vanilla bean paste or vanilla extract and cherry pie filling (which is optional).
To Make the Crust
To make the cheesecake crust, you will need either a food processor or just use your hands to break the graham crackers. The food processor method is much easier and ensures even crust, but if you don’t have one, that’s fine, as I said just use your hands.
So break up the graham crackers into a sandy texture, then mix it with softened butter. It depends on whether the crackers/biscuits your using are sweetened or not, and how sweet do you want your crust, you can add sugar or skip it.
So, pulse everything together until you get a mixture that is not dry and sandy, and is not sticky either. You need it to be somewhere in the middle so that it holds texture when pressing it into a greased springform pan.
For the 6 and 8 quart Instant Pot, the 7-inch springform pan should be used.
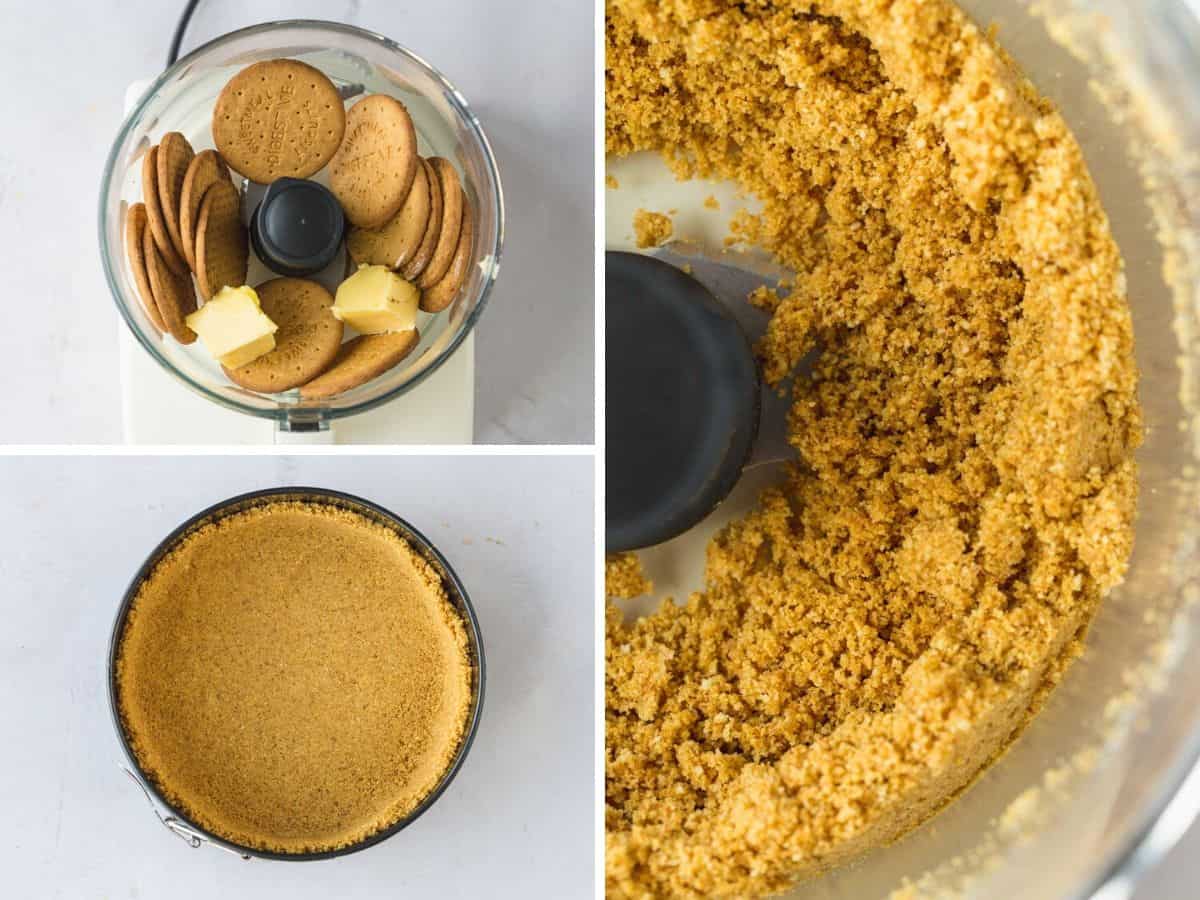
I like to use the back of the my stainless steel measuring cups to press the mixture into the springform as it makes the process much easier, and it looks neater.
To help the crust hold its shape, you can either freeze it for 10-15 minutes. Or bake it in a preheated oven at 190C (375F) for 10 minutes. I usually go for the freezing option as it’s easier, and works well.
To Make the Cheesecake Mixture
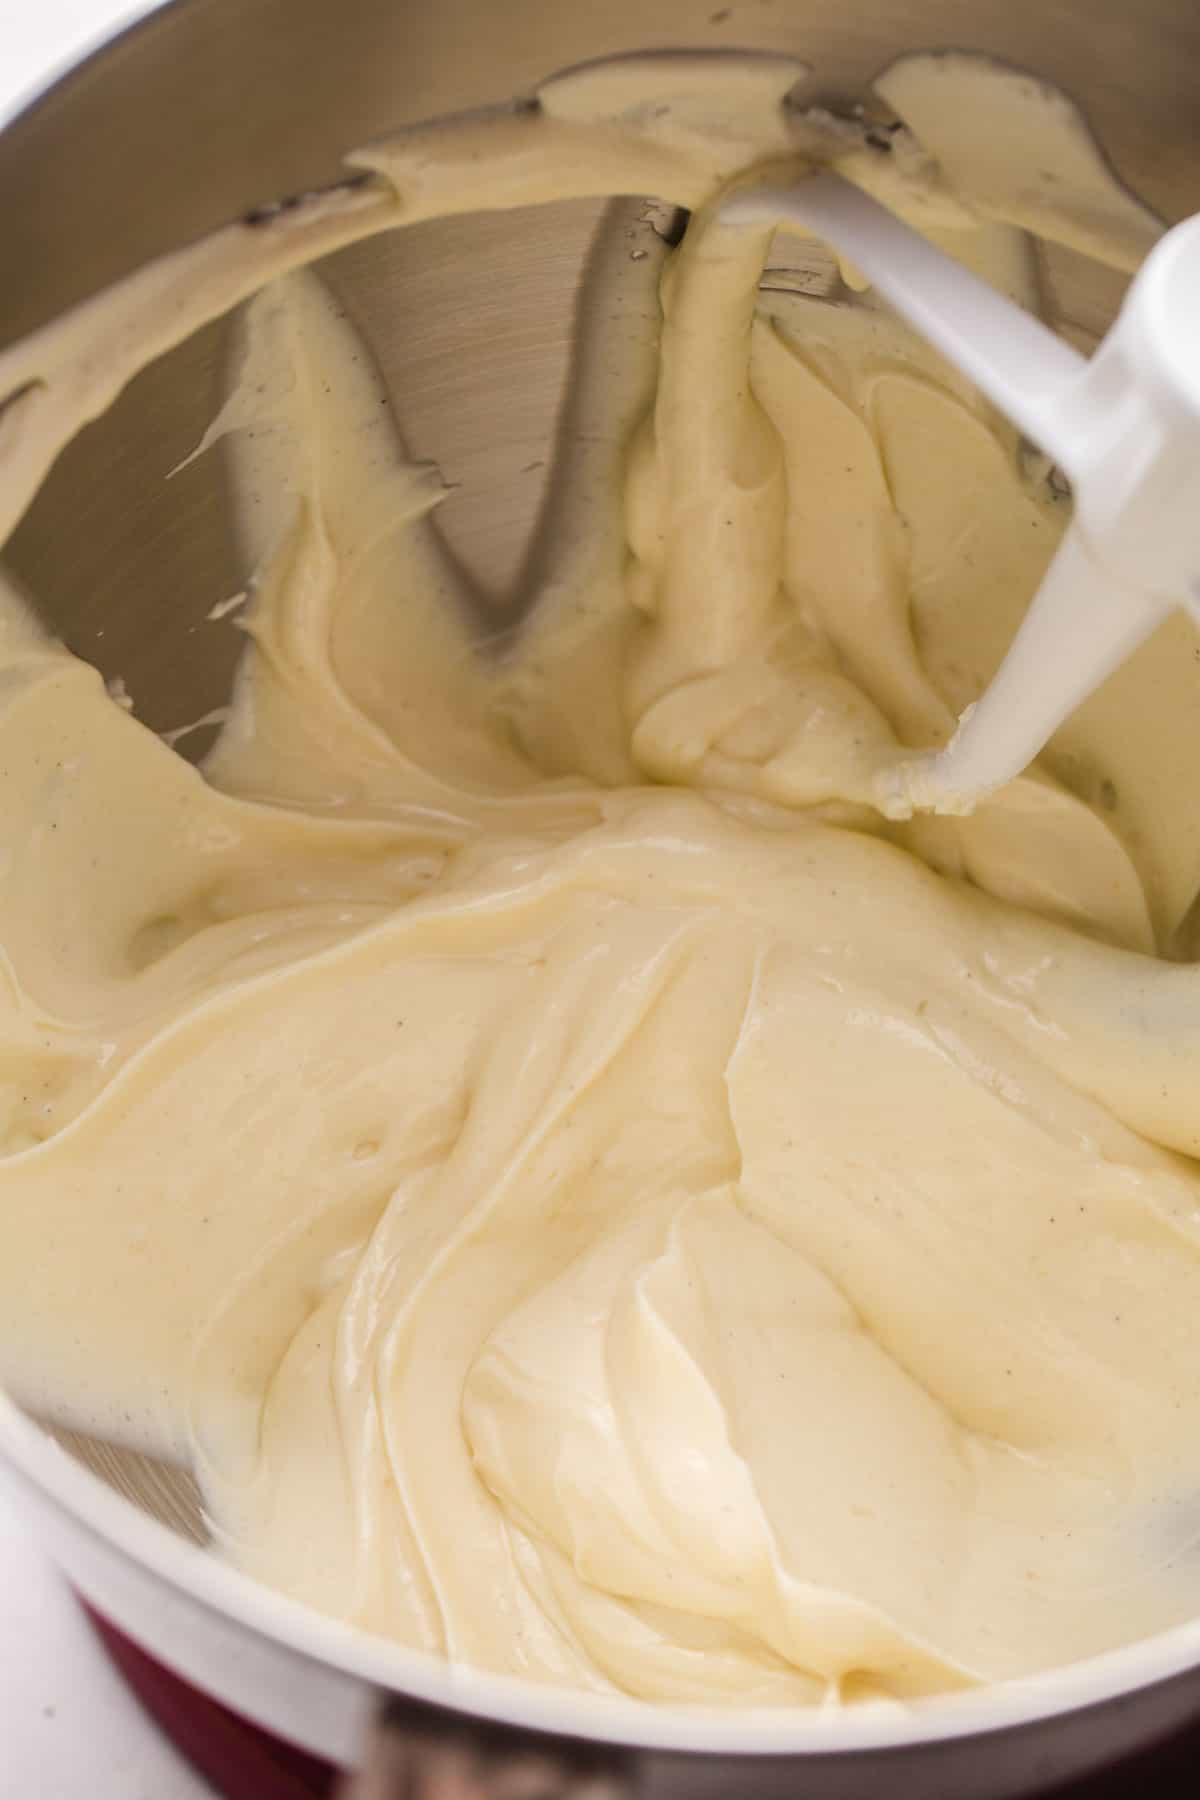
This process is the same as what you would do if you were to make any cheesecake. In a mixing bowl or a bowl of a stand mixer, beat the cream cheese until it’s soft and creamy. Add the sugar, and mix until combined.
Add eggs, one at a time, fully incorporating each before adding the next. Making sure to scrape down the bowl in between each egg.
Add in the flour, heavy cream, and vanilla bean paste (or vanilla extract) and mix until the mixture is smooth.
For this whole process, you can either use a hand mixer, a stand mixer, or even a whisk.
Pour batter over the cheesecake crust, and cover with foil. The reason why you want to cover it with foil is so that the steam does not fall over the cheesecake mixture and ruin the texture for you. So make sure that you cover it with foil tightly.
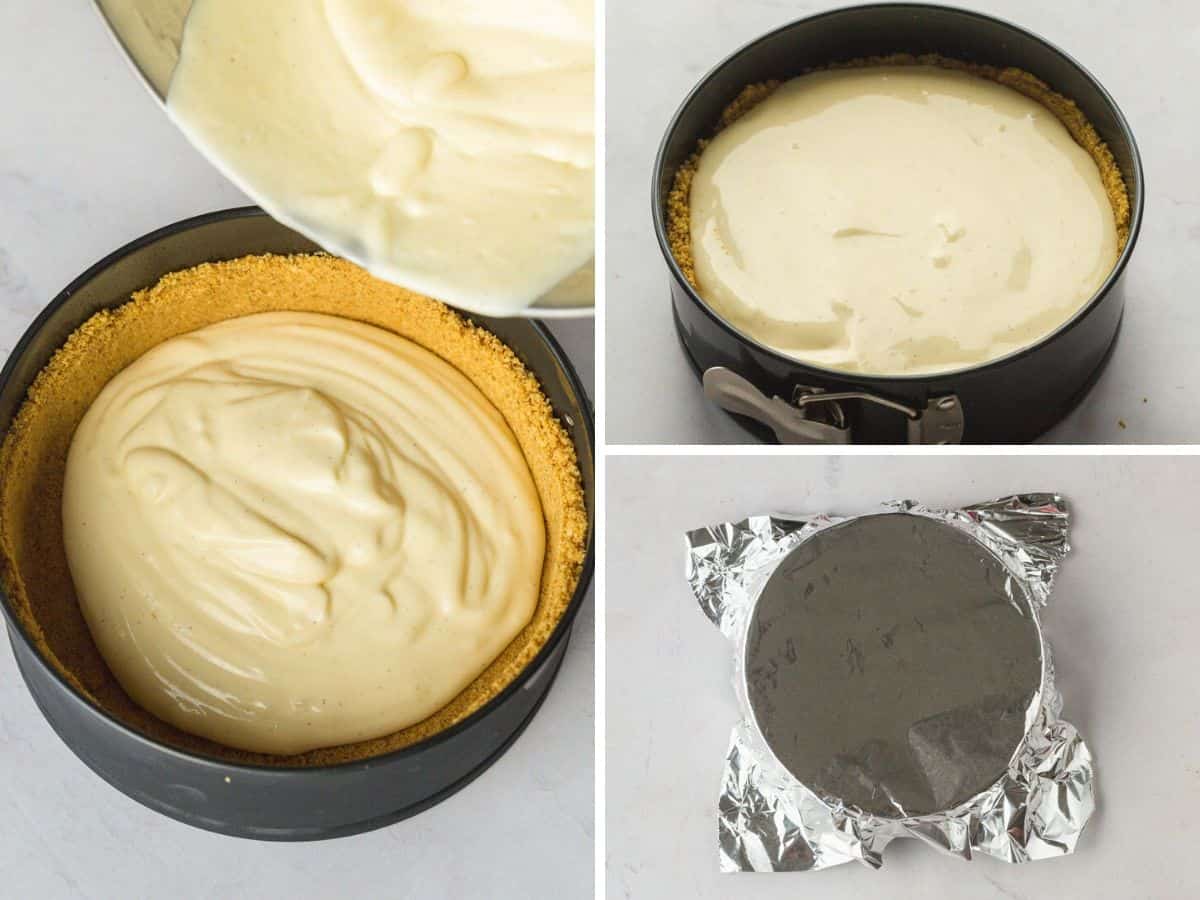
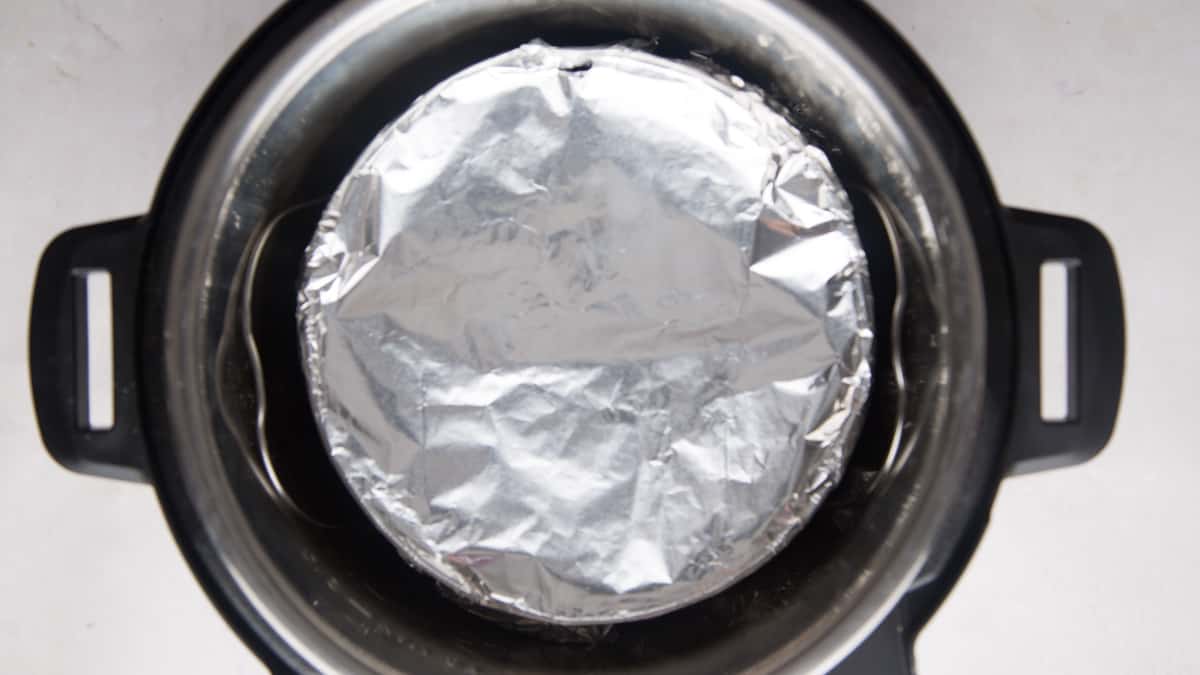
Add one cup of water to the stainless steel insert of the Instant Pot, then place the springform pan on a trivet and lower it into the Instant Pot.
You can create a “foil sling” to make it easier for you to take the cheesecake out after pressure cooking. I personally use my mitts and carefully hold the trivet from the sides when I take it out. However, you can create a foil sling by folding a 15 or 20-inch long piece of foil in half lengthwise two times. This “sling” will allow you to place and remove the springform pan with ease.
Fold down the excess foil from the sling to ensure the pot closes properly. Lock the lid into place and make sure the vent is closed “sealing”. Press the “Manual” button and cook on high pressure for 35 minutes. Initially, I tested this recipe and pressure cooked for 30 minutes but the texture was not right, it was too soft and didn’t have that crumbly but creamy texture. So cook it for 35 minutes for best results.
When the Instant Pot beeps, hit the “Keep Warm/Cancel” button to turn off the pressure cooker. Allow the pressure to release naturally.
Carefully unfold the foil sling and remove the cheesecake from the pot to a cooling rack using the foil sling “handles”.
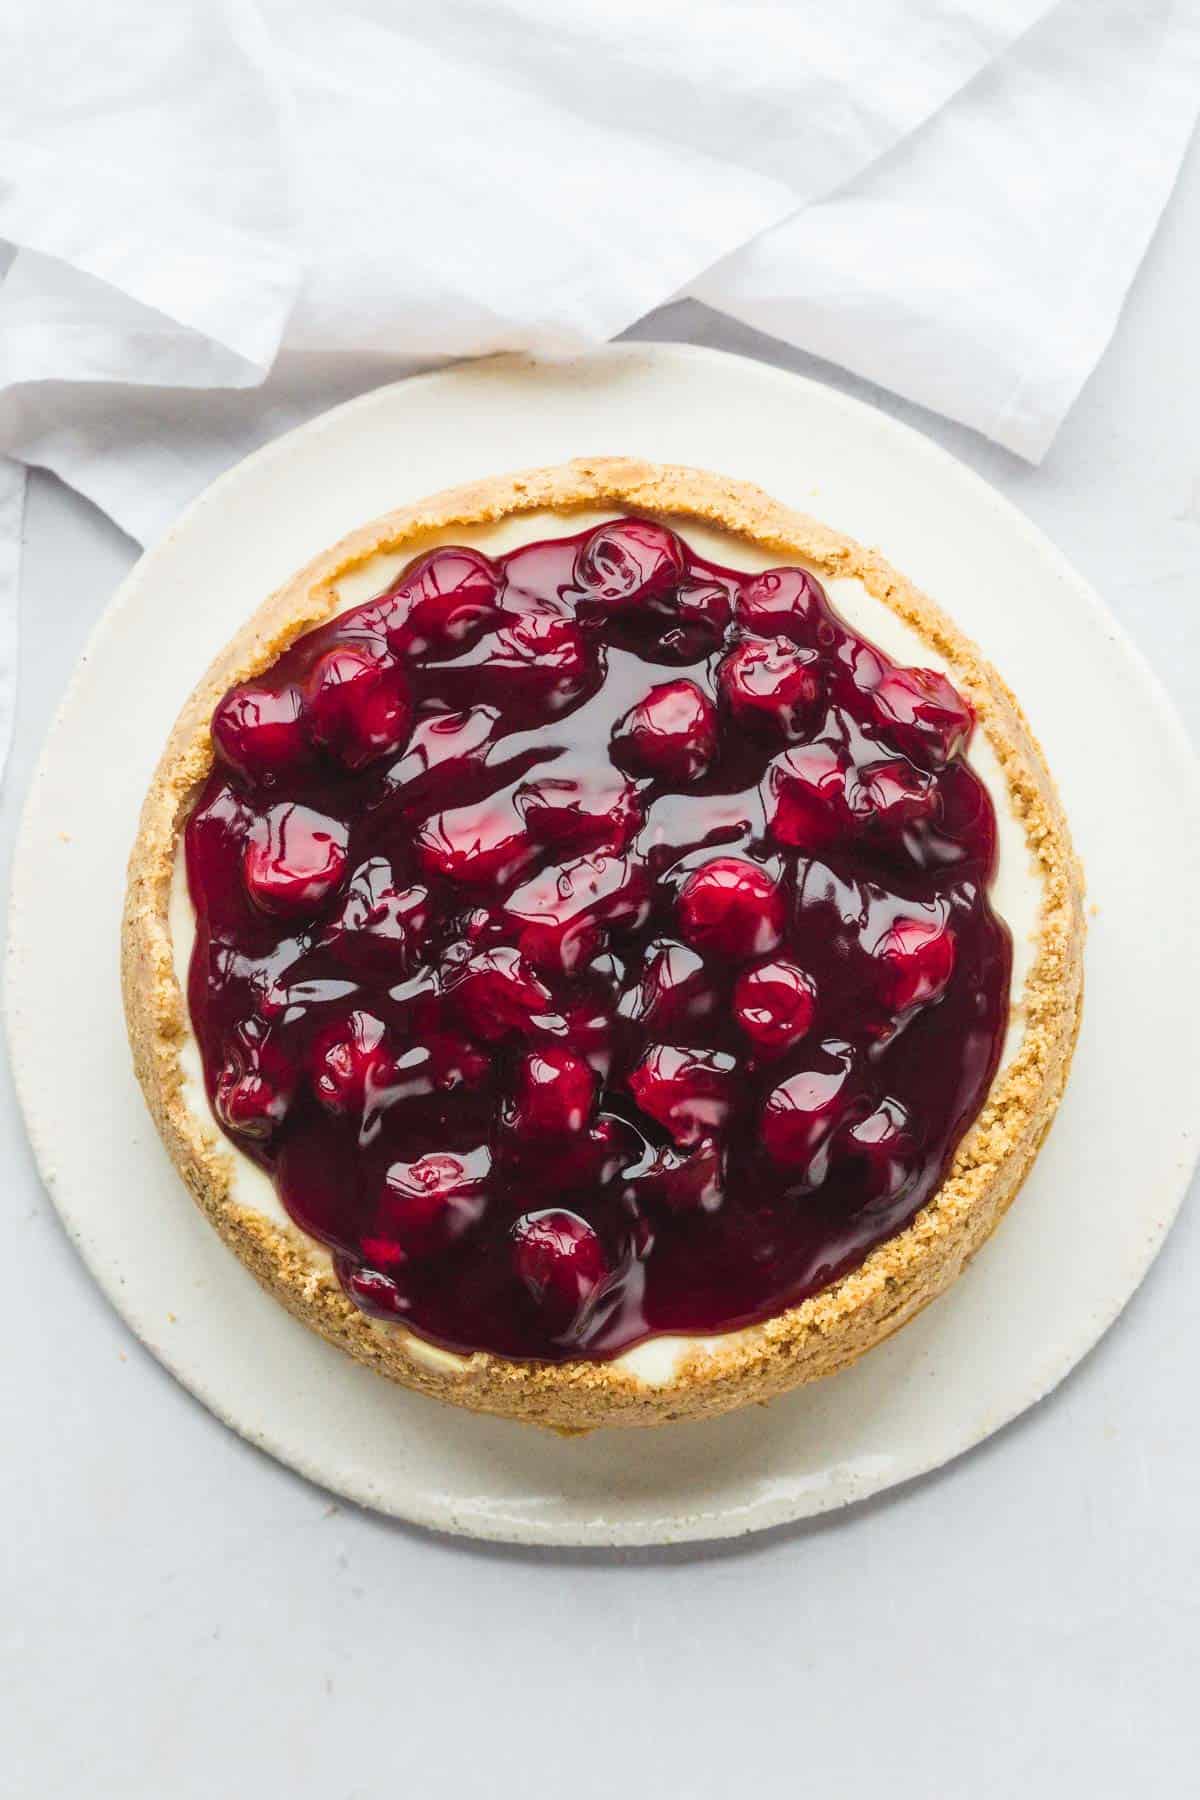
Uncover the cheesecake and allow it to cool to room temperature. Once the cheesecake has cooled, refrigerate it for at least 4 hours, or preferably overnight. The cheesecake always tastes better the next day!
Invest in a Separate Sealing Ring to Use for Desserts
It’s also worth investing in a separate sealing ring that you only use for desserts. These rings usually absorb smells, and your cheesecake might smell like your last night’s dinner. So please get a separate ring to avoid that!
You can even purchase sealing rings in different colors, and decide which is for desserts and yogurt, and the other ring is for savory meals.
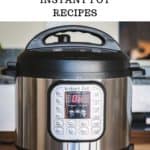
Why “Bake” a Cheesecake in an Instant Pot?
This is my favorite method for making cheesecake, because it is way easier than the oven method. You don’t have to worry about the water bath as using the Instant Pot creates the needed water bath. So it steams your cheesecake into the right texture!
Plus, you don’t have to keep checking on the cheesecake every 15 minutes. Or leave the oven door open overnight after you bake it so that it does not crack.
Cheesecake Topping Ideas
I love using pie filling as this is what my Mom always did. But you can also top your cheesecake with whipped cream and fresh fruit, or go for caramel, cinnamon apples, or just serve it plain!
How to Store, Freeze, and Thaw.
- Fridge: To keep the cheesecake as fresh and flavorful as possible, store it in the fridge in a tightly-closed container or in a cake container for up to 5 days. Remove the cheesecake from the fridge about 30 minutes before serving to let it warm slightly.
- Freezer: To freeze it, wrap tightly in aluminium foil and keep in the freezer for up to 3 months.
- To thaw: Place the frozen cheesecake in the fridge for 8 hours before serving.
For more delicious and nourishing recipe ideas, click here. Also, make sure to check out my other Instant Pot recipes.
If you try this recipe, please don’t forget to rate it and share a picture on social media, tagging #NourishPlate in your posts. I would really love to see your creations. Bon appetit!
Instant Pot Cheesecake
Equipment
- mixing bowl
- hand mixer or stand mixer or whisk.
- trivet
Ingredients
For the crust
- 1 cup graham cracker crumbs
- 2 tablespoons granulated sugar
- 3 tablespoons unsalted butter softened
For the cheesecake mixture
- 14 ounces cream cheese at room temperature
- ⅓ cup granulated sugar
- 2 large eggs at room temperature
- 1 tablespoon all-purpose flour
- ¼ cup heavy cream
- 2 teaspoon pure vanilla extract or vanilla bean paste
Topping
- 1 can (21 ounce) cherry pie filling optional
Instructions
To Make the Crust
- Use a food processor or your hands to break the graham crackers into a sandy texture, then mix it with softened butter.
- Add sugar to the crackers/biscuits (this is optional as it depends on whether the crackers/biscuits your using are sweetened or not, and how sweet do you want your crust).
- Pulse everything together until you get a mixture that is not dry and sandy, and is not sticky either. It should be somewhere in the middle so that it holds texture when pressing it into a greased springform pan.
- Use measuring cups to press the mixture into the springform as it makes the process much easier, and it looks neater.
- Freeze the crust for 10-15 minutes, or bake it in a preheated oven at 190°C (375°F) for 10 minutes. I usually go for the freezing option as it's easier, and works well.
To Make the Cheesecake Mixture
- In a mixing bowl or a bowl of a stand mixer, beat the cream cheese until it's soft and creamy. Add the sugar, and mix until combined.
- Add eggs, one at a time, fully incorporating each before adding the next. Making sure to scrape down the bowl in between each egg.
- Add in the flour, heavy cream, and vanilla bean paste (or vanilla extract) and mix until the mixture is smooth using a hand mixer, a stand mixer, or a whisk.
- Pour batter over the cheesecake crust, and cover it tightly with foil.
- Add one cup of water to the stainless steel insert of the Instant Pot, then place the springform pan on a trivet and lower it into the Instant Pot.
- You can create a “foil sling” to make it easier for you to take the cheesecake out after pressure cooking, or use mitts and carefully hold the trivet from the sides when taking it out. To create a foil sling, fold a 15 or 20-inch long piece of foil in half lengthwise two times. This “sling” will allow you to place and remove the springform pan with ease. Fold down the excess foil from the sling to ensure the pot closes properly.
- Lock the lid into place and make sure the vent is closed “sealing”. Press the “Manual” button and cook on high pressure for 35 minutes.
- When the Instant Pot beeps, hit the “Keep Warm/Cancel” button to turn off the pressure cooker. Allow the pressure to release naturally.
- Carefully unfold the foil sling and remove the cheesecake from the pot to a cooling rack using the foil sling “handles”.
- Uncover the cheesecake and allow it to cool to room temperature. Once the cheesecake has cooled, refrigerate it for at least 4 hours, or preferably overnight.
- Before serving, top with pie filling, whipped cream and fresh fruit, or serve plain.
Notes
- For the 6 and 8 quart Instant Pot, the 7-inch springform pan should be used.
- Cover the batter with foil tightly after pouring it over the cheesecake crust. It is important to do this so that the steam does not fall over the cheesecake mixture and ruin the texture.
- Allow the cheesecake to cool down completely before placing in the fridge. Refrigerate for at least 4 hours, and preferably overnight for a better taste and texture.
Nutrition
This website provides approximate nutrition information for convenience and as a courtesy only. Nutrition data is gathered primarily from the USDA Food Composition Database, whenever available, or otherwise other online calculators.
did you make this recipe?
Make sure to follow on Pinterest @nourishplate and on Instagram @nourishplate


Comments & Reviews
Broacher says
Just a note about keeping the seal ‘odor-free’ between savoury and sweet dishes:
You can remove strong odors from the ring by simply ‘baking’ them out of the ring in a hot oven. Thirty minutes at 375f works well for me.
Let it cool and give it a sniff test. If you still smell something, give it more time.
This method even removed garlic and curry smells.
Linda says
Won’t it melt?
Betty Ellis says
Can you use a six inch pan
Diana says
Yes! It should work fine.
Tiffy says
This looks like a nice smooth texture… HOWEVER, I have a 3qt mini IP. I usually use a 6×3 springform or push up pan.
My questions to you are:
would I adjust my time with the smaller pan and size of my IP?
I also notice a couple different ingredients and measurements.
Does the heavy cream need to be room temperature?
I will follow your ingredients and steps, but using 2oz less cream cheese, does that make a huge difference?
I will trying this recipe EXACTLY and hope it turns out remotely close to yours.
Thanks in advance. I look forward to hearing your answers..
Tiffy