
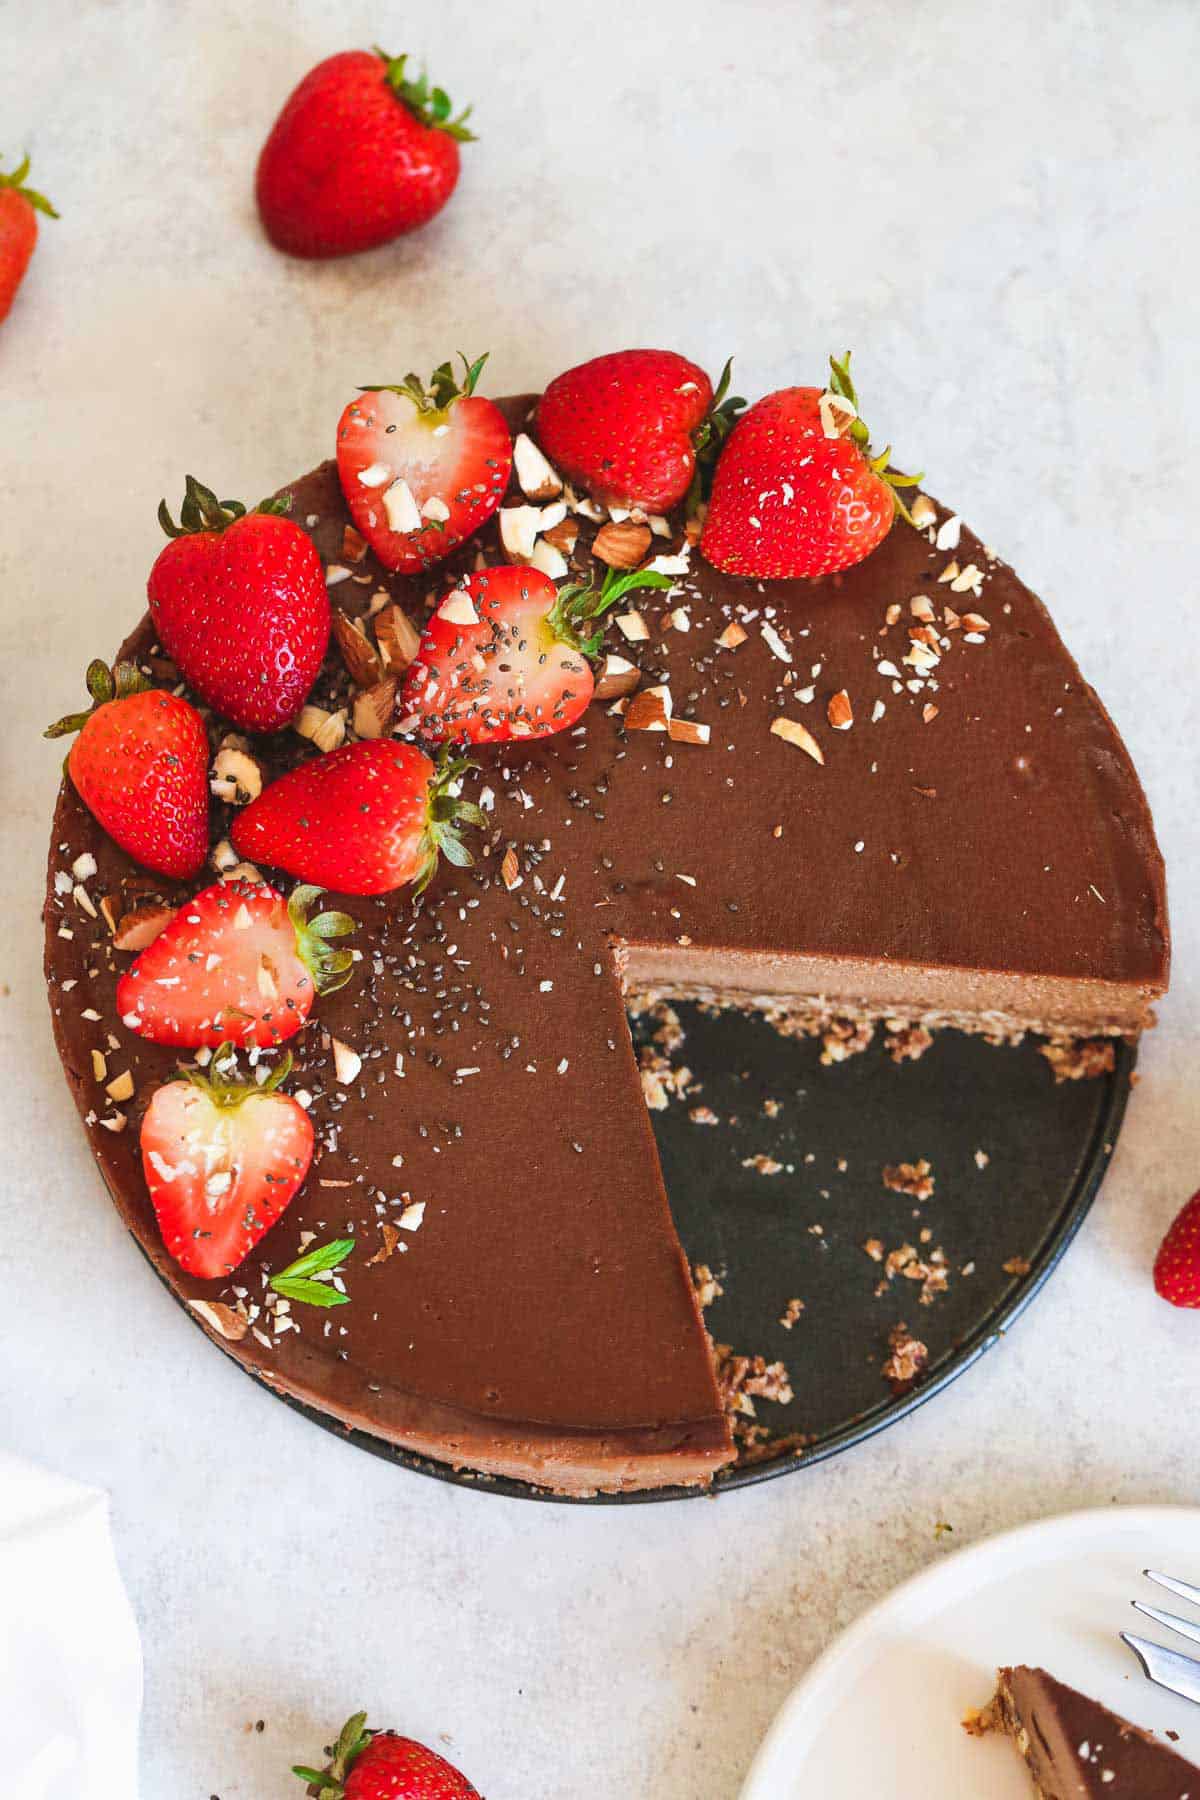
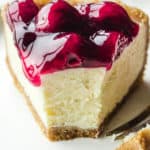
Easy vegan chocolate cheesecake made silky, creamy, and smooth! This no-bake cheesecake is made with cashews. It’s refined-sugar free, 100% natural, so easy to make, and absolutely delicious! Plus, it’s gluten-free.
Nothing beats a delicious, healthy, and no-bake dessert on a hot summer day! And this vegan chocolate cheesecake has been my absolute favorite dessert for so many years now, in addition to the Instant Pot Cheesecake.
I love the fact that it’s so easy to make. But my favorite thing about it is that since it’s stored in the freezer, we don’t need to finish it up in a day or two. And that means that I can always open my freezer and enjoy a slice of heaven in a chocolate cheesecake form!
How to Make Vegan Cheesecake
You need quite a few ingredients to make this vegan cheesecake. I always create a list, and make sure that I buy everything I need before I start.
The Ingredients
It’s a cashew based cheesecake, so you will need cashews. Also, you’ll need raw cacao powder, coconut oil, pure vanilla extract, lemon juice, a pinch of salt and date syrup. However, date syrup can be substituted with brown rice syrup or maple syrup.
Other ingredients that you’ll need to make the base of this cheesecake are: almonds, walnuts and soft dates.
The Directions
To make the base
- Start by adding the nuts, dates, cacao powder, salt and melted coconut oil to the food processor bowl. Then, chop everything until you get a crumbly mixture.
- Press the mixture into the bottom of your springform pan, and place in the fridge to chill as you prepare the filling.
To make the filling
- In a blender, blend the soaked cashews and the rest of the ingredients until you get a very smooth mixture.
- Pour the mixture over the refrigerated base. Smooth the top out using a rubber spatula then place in the freezer to freeze and set.
To serve
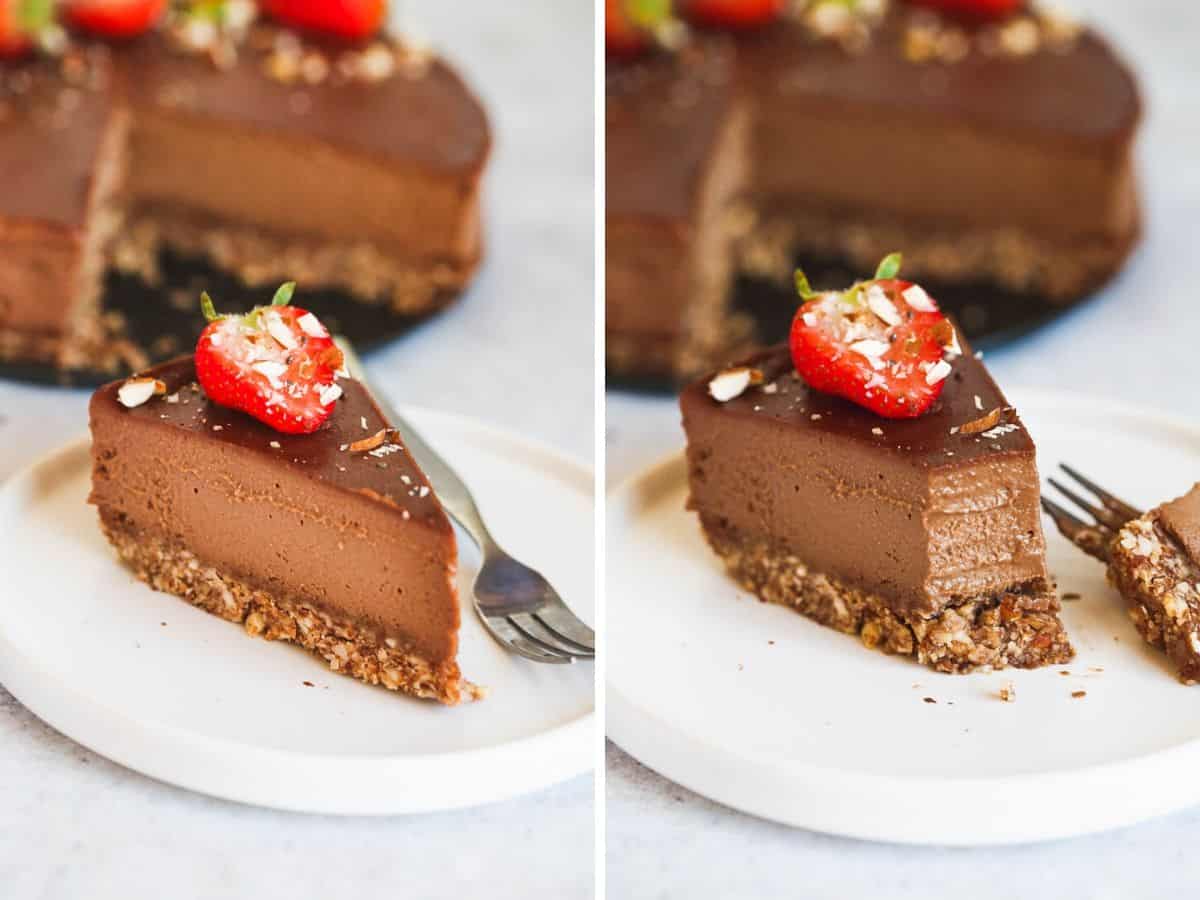
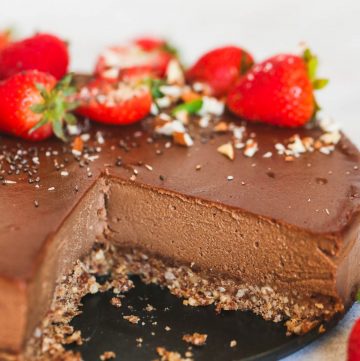
- Allow the cheesecake to defrost and soften a little before slicing and serving. Decorate with your favorite toppings. Enjoy!
Cheesecake Topping Ideas
I love decorating my vegan cheesecake with nuts and strawberries. But you can also top your cheesecake with whipped cream, fresh fruit and seeds if desired. Alternatively, you can serve it plain.

How to Store the Vegan Cheesecake
- Freezer: To keep the cheesecake fresh and flavourful, wrap tightly in aluminium foil and keep in the freezer for up to 3 months (I bet it won’t stay there for that long).
- To thaw: Take it out of the freezer and allow it to soften a bit before serving.
For more delicious and nourishing recipe ideas, click here. Also, make sure to check out my desserts recipes, and why not give this Easy Condensed Milk Fudge Recipe a try!
Did you make this? Be sure to leave a review below and tag me on Facebook, Instagram, or Pinterest!
Vegan Chocolate Cheesecake
Equipment
- Springform pan
- Blender
- spatula
Ingredients
Base
- 1 cup (100g) almonds
- 1 cup (100g) walnuts
- ¼ cup (75g) dates soft
- ½ tablespoon cacao powder
- ¼ teaspoon salt
- 2 and ½ tablespoons coconut oil melted
Filling
- 1 and ½ cups (275g) cashews soaked for at least two hours
- ¾ cup (175ml) water
- ½ cup (50g) cacao powder raw
- ½ (150g) date syrup or brown rice syrup or maple syrup
- 3 tablespoons coconut oil melted
- 1 and ½ teaspoons pure vanilla extract
- 2 tablespoons lemon juice
- ¼ teaspoon salt
Instructions
To make the base
- To the food processor bowl, add the nuts, dates, cacao powder, salt and melted coconut oil. Chop everything until you get a crumbly mixture.
- Press the mixture into the bottom of your springform pan, and place in the fridge to chill as you prepare the filling.
To make the filling
- In a blender, blend the soaked cashews and the rest of the ingredients until you get a very smooth mixture.
- Pour the mixture over the refrigerated base, smooth the top out using a rubber spatula then place in the freezer to freeze and set.
To serve
- Allow the cheesecake to defrost and soften a little before slicing and serving. Decorate with fresh fruit, seeds, and nuts if desired.
Notes
- Date syrup can be substituted with brown rice syrup or maple syrup.
- I like to use the back of the my stainless steel measuring cups to press the mixture into the springform as it makes the process much easier, and it looks neater.
- Topping ideas: I love decorating the cheesecake with nuts and strawberries. But you can top your cheesecake with whipped cream, fresh fruit and seeds. You can also serve it plain if desired.
- Storing: To keep the cheesecake fresh and flavourful, wrap tightly in aluminium foil and keep in the freezer for up to 3 months. Before serving, take it out of the freezer and allow it to soften a bit then slice and enjoy!
Nutrition
This website provides approximate nutrition information for convenience and as a courtesy only. Nutrition data is gathered primarily from the USDA Food Composition Database, whenever available, or otherwise other online calculators.
did you make this recipe?
Make sure to follow on Pinterest @nourishplate and on Instagram @nourishplate


Comments & Reviews
Kristen D says
Anything I can substitute for the almonds and dates/date syrup?
I’d like to make this, but there’s an almond allergy and sugar issues. We’re good with monk fruit or stevia and other nuts.
Thanks!
Paulette says
Hi, Diana,
Would you please take another look at the nutritional values that are posted? The numbers for at least carbohydrates and calories seem way off given that many nuts. Getting ready to make it for a Type 1 diabetic and he’ll rework his own numbers but looks delicious!
Majed says
Do we have to freeze it or can we refrigerate instead?
Diana says
It actually needs to be frozen to set. Enjoy the recipe Majed!
Majed says
For the filling, do we need to freeze it or will it be enough to refrigerate it?
Julie Harman says
That’s it, it’s done and in the freezer, the mixtures tastes lovely, didn’t think it would be sweet enough but it really is! Am I right in saying that this is ok for diabetics too?
Diana says
Awesome! It’s not overly sweet that’s why I really like this recipe. I hope that you like it as much as I do! Sorry, I can’t give you any advice on whether this is ok for diabetics or not as I don’t know much about what diet works for them, but I think this is a healthier cheesecake as no dairy or ordinary sugar goes in the recipe.
Julie Harman says
Hi, is the 175ml of water to soak the cashews in or is that extra? If so, would you add the used liquid to the mix too? Bit confused! Many thanks
Diana says
Hi Julie, the water is a part of the filling and has nothing to do with soaking the cashews. So just add 175ml of water to the rest of the filling ingredients and blend. Let me know how it turns out 🙂
Julie Harman says
Brilliant, thankyou I will x