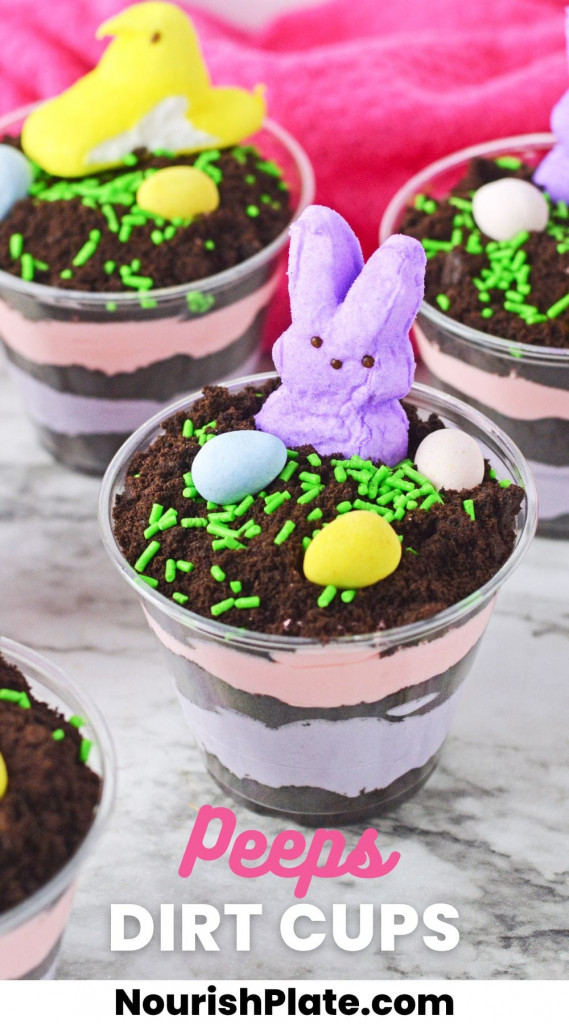
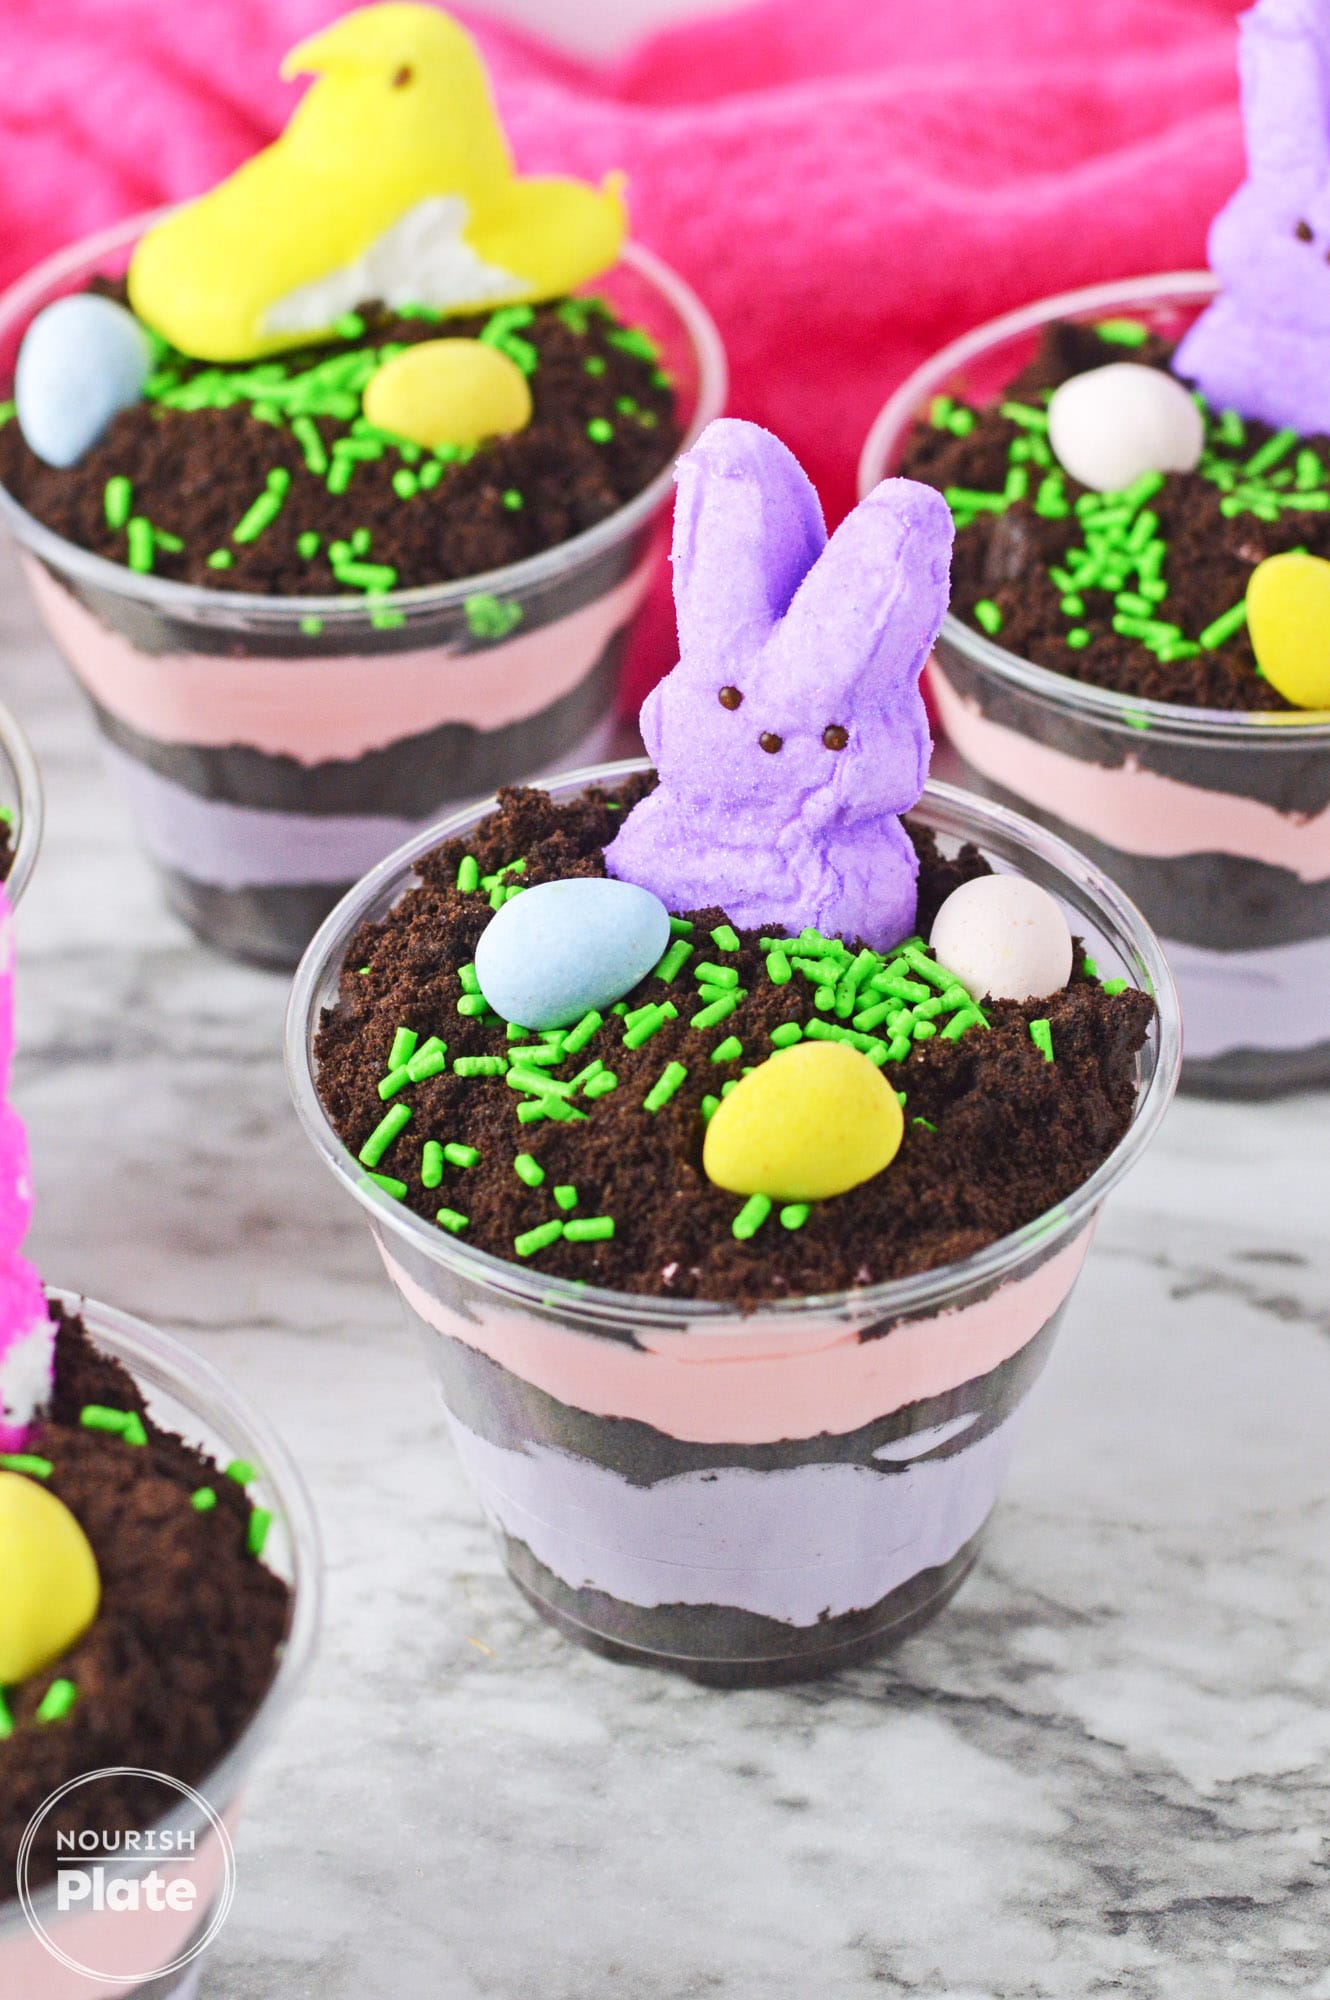
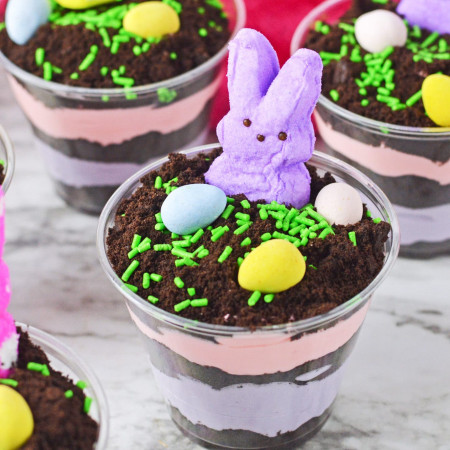
Easter Dirt Cups are a fun and festive dessert that’s perfect for celebrating the spring season and the Easter holiday. These are so fun to make with the kids, and they love eating them too. To make these cute Easter cups, you’ll need just a few simple ingredients including an instant pudding mix that you will color with pastel colors, Oreo cookie crumbs, and some adorable Peeps marshmallows and sprinkles!

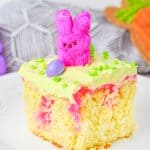
My kids love Peeps, and it is not Easter without their favorite marshmallows! We buy them to decorate all types of desserts like this adorable Peeps poke cake that I make every year, to make dirt cups, Peeps S’mores, and even cocktails for the grown-ups!
These dirt cups are super simple to make, and can be whipped up in just 15 minutes from start to finish. Get creative when choosing the colors that you’ll be adding to your creamy pudding mix, and decorate with Peeps and your favorite holiday sprinkles.
Key Ingredients
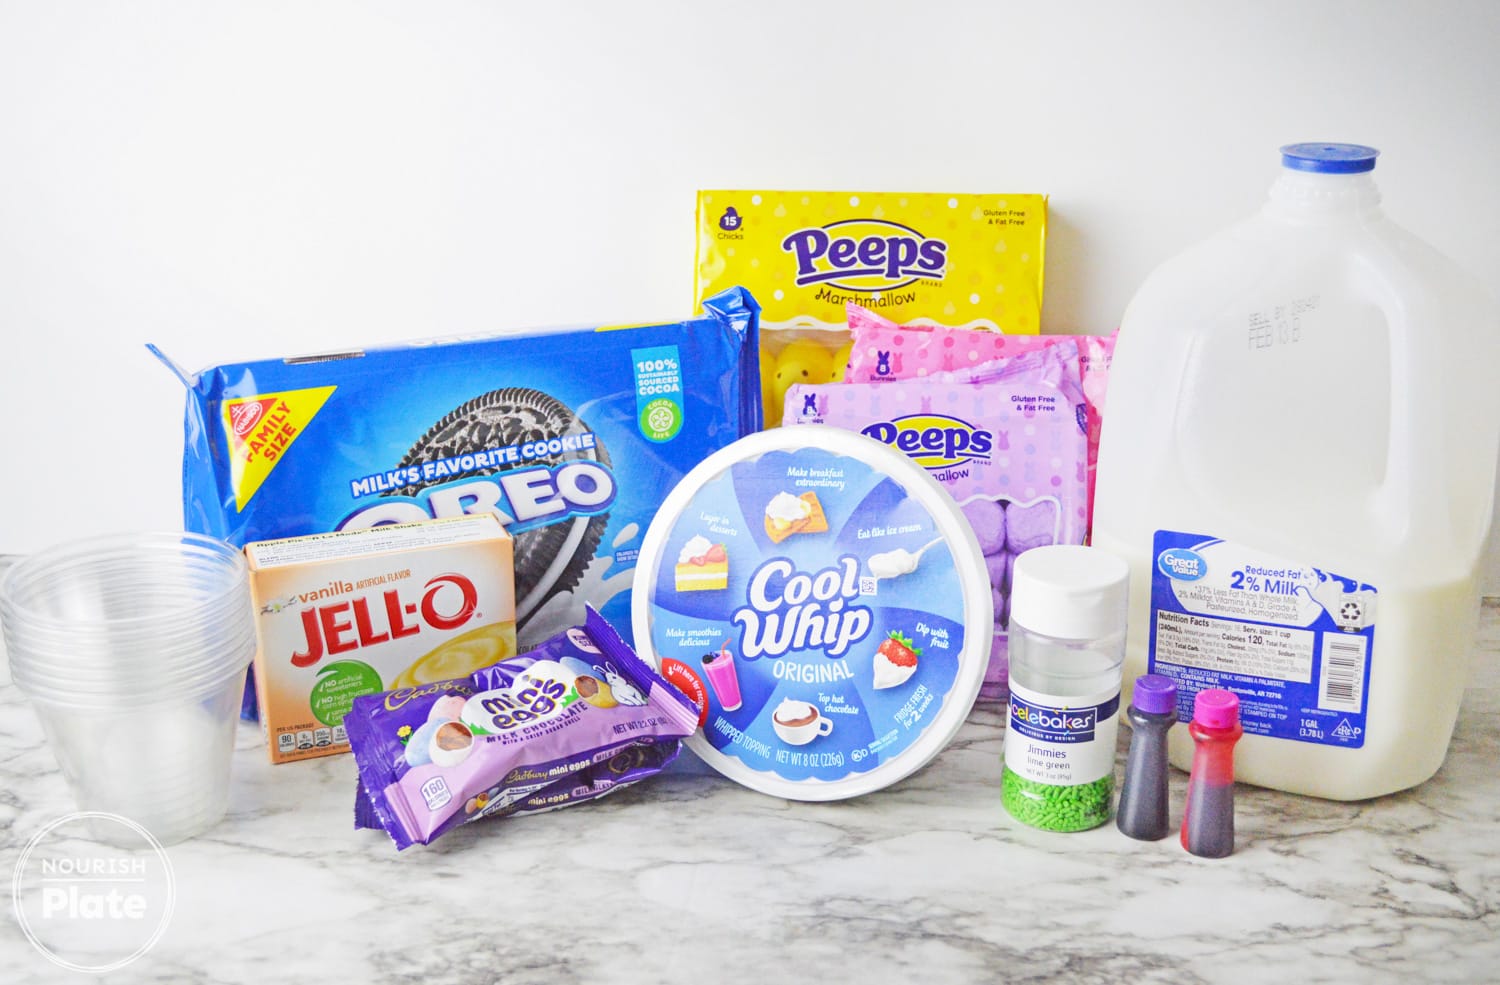
- Oreos: I like to use Oreo cookies that I crush to make crumbs, they look like “dirt”. But feel free to change things up, and use golden Oreo cookies instead, nilla wafers, or your favorite cookie!
- Pudding: We are using instant vanilla pudding mix here. Do not substitute with the “cook and serve” type as that one needs cooking, and won’t properly set if you just mix it with milk.
- Whipped Topping: You will need one 8-ounce tub of thawed whipped topping such as cool whip, or the store brand.
- Peeps: I got some bunnies and chicks since these dirt cups are Easter themed.
- Mini Eggs and Sprinkles, to decorate the dessert.
Complete list of ingredients with quantities and instructions is located in the recipe card below
How To Make Easter Dirt Cups
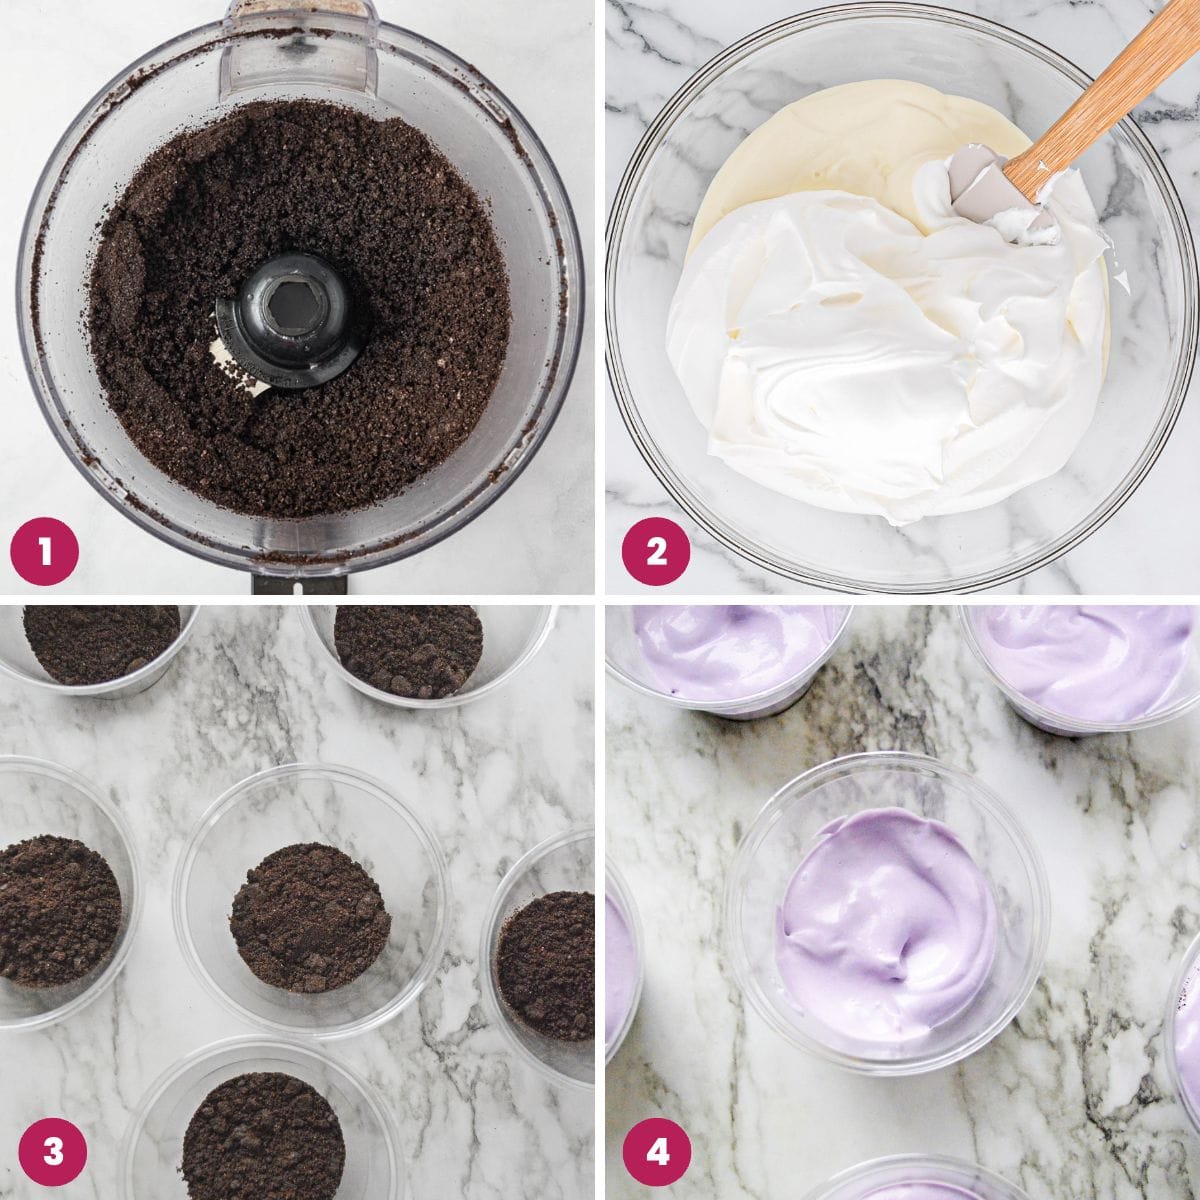
- In a food processor, crush the Oreo cookies to create crumbs. Alternatively, add them to a zip-top bag and crush the cookies with a rolling pin. Divide the crushed Oreo cookies between 3 bowls.
- In a large mixing bowl, whisk together vanilla pudding mix and 3 cups of milk, and keep stirring for about a minute or until the mixture begins to thicken. Add whipped topping to the pudding mixture, and gently fold it in.
- Take a bowl of the Oreo cookie crumbs, and divide that between 6 plastic cups.
- Divide the pudding mixture by putting a third of the mixture in one bowl, and two-thirds of the mixture in another. To the smaller bowl, add a few drops of purple gel food coloring, or enough to reach the desired color. Divide the purple pudding evenly among your cups, filling them about a third full.
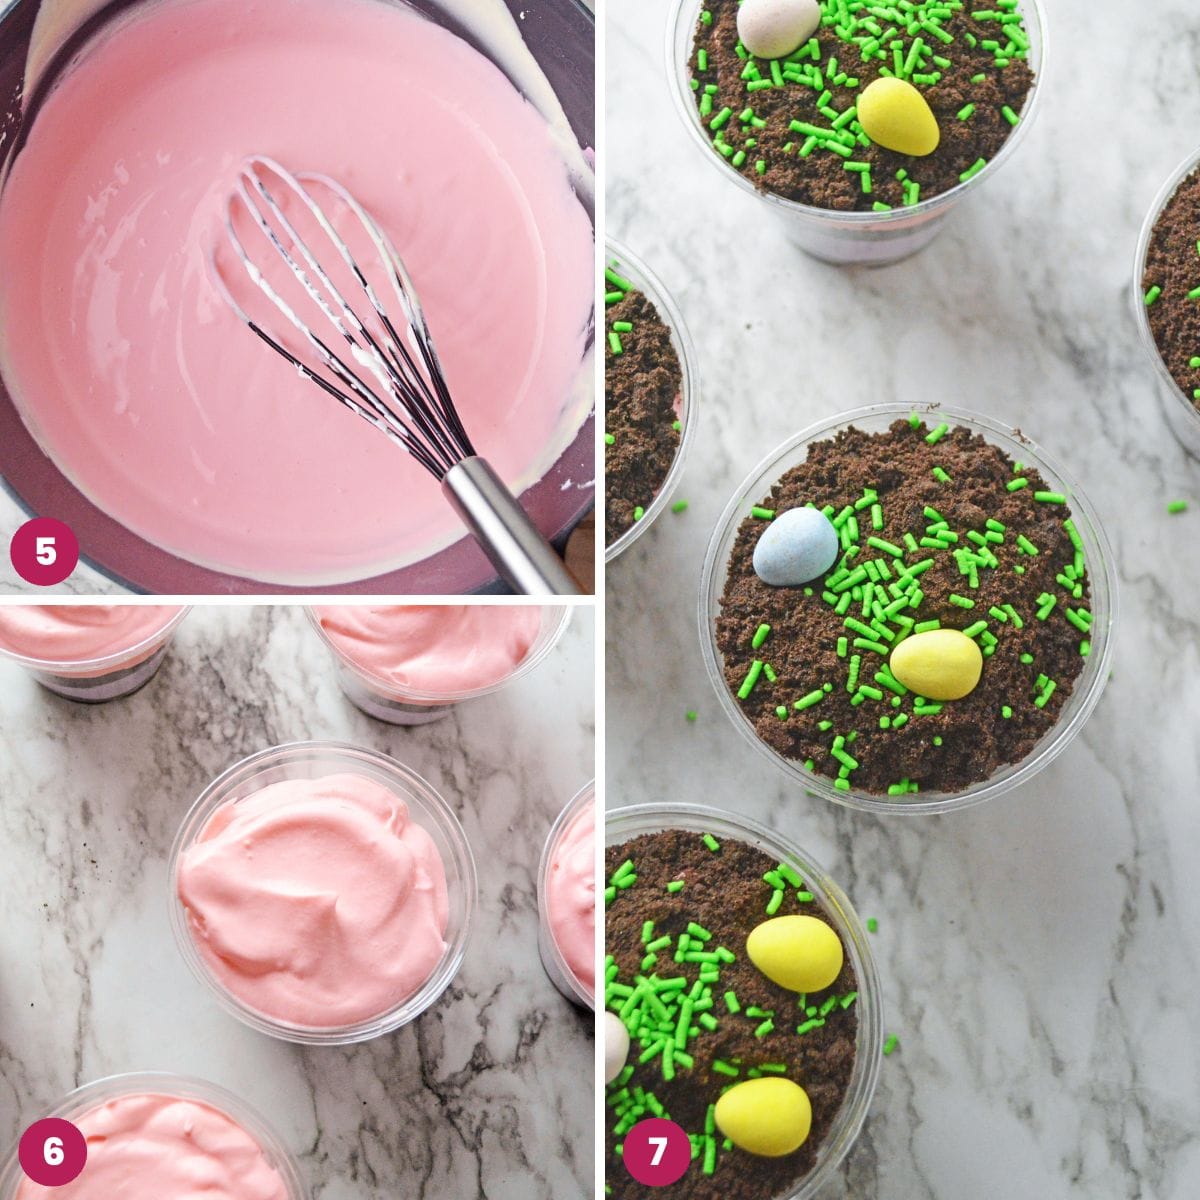
- Take another bowl of crushed Oreo cookies, and divide evenly among the 6 cups, making the second layer of Oreos on top of the purple pudding mixture. Take your remaining bowl of pudding, and add a few drops of pink gel food coloring or enough to reach the desired color.
- Divide the pink pudding mixture among your cups, leaving just a small amount of space at the top for a final oreo layer. Discard any excess pink pudding, or use it for another recipe.
- Divide the final bowl of crushed Oreo crumbs between your 6 cups. Decorate each cup with holiday green sprinkles, and add a Peep marshmallow and a couple of mini egg candies. Serve immediately, or keep in the fridge until you’re ready to serve.
Tips For Making Dirt Cups
- Use your favorite cookie for the crushed cookie crumbs. You can go for chocolate grahams, or any other vanilla cookie that you enjoy. Try golden Oreos or nilla wafers with banana or lemon flavored instant pudding.
- For a different flavor instant pudding flavor, try chocolate, banana, lemon, white chocolate, or cheesecake flavor.
- Chill the pudding cups if you have time, this will help the pudding to set and the ingredients to meld together.
- When layering the contents, try to get even layers for a nice presentation.
Enjoy making these Easter pudding cups AND eating them! The kids are going to go crazy when they see them. Happy Easter!
Did you make this? Be sure to leave a review below and tag me on Facebook, Instagram, or Pinterest!
Easter Dirt Cups
Equipment
- Whisk
- 6 9oz plastic cups
Ingredients
- 36 Oreo cookies filling removed
- 1 6 oz. package vanilla instant pudding
- 3 cups milk cold
- 8 ounces whipped topping thawed
- Green sprinkles
- 9 Peeps marshmallows
- Mini egg candies
- Pink and green gel food coloring
Instructions
- In a food processor, crush the Oreo cookies to create crumbs. Alternatively, add them to a zip-top bag and crush the cookies with a rolling pin.
- Divide the crushed Oreo cookies between 3 bowls.
- In a large mixing bowl, whisk together vanilla pudding mix and 3 cups of milk, and keep stirring for about a minute or until the mixture begins to thicken.
- Add whipped topping to the pudding mixture, and gently fold it in.
- Take a bowl of the Oreo cookie crumbs, and divide that between 6 plastic cups.
- Divide the pudding mixture by putting a third of the mixture in one bowl, and two-thirds of the mixture in another.
- To the smaller bowl, add a few drops of purple gel food coloring, or enough to reach the desired color.
- Divide the purple pudding evenly among your cups, filling them about a third full.
- Take another bowl of crushed Oreo cookies, and divide evenly among the 6 cups, making the second layer of Oreos on top of the purple pudding mixture.
- Take your remaining bowl of pudding, and add a few drops of pink gel food coloring or enough to reach the desired color.
- Divide the pink pudding mixture among your cups, leaving just a small amount of space at the top for a final Oreo layer. Discard any excess pink pudding, or use it for another recipe.
- Divide the final bowl of crushed oreos between your 6 cups.
- Decorate each cup with holiday green sprinkles, and add a Peep marshmallow and a couple of mini egg candies. Serve immediately, or keep in the fridge until you're ready to serve.
Notes
- Use your favorite cookie for the crushed cookie crumbs. You can go for chocolate grahams, or any other vanilla cookie that you enjoy. Try golden Oreos or nilla wafers with banana or lemon flavored instant pudding.
- For a different flavor instant pudding flavor, try chocolate, banana, lemon, white chocolate, or cheesecake flavor.
- Chill the pudding cups if you have time, this will help the pudding to set and the ingredients to meld together.
- When layering the contents, try to get even layers for a nice presentation.
Nutrition
This website provides approximate nutrition information for convenience and as a courtesy only. Nutrition data is gathered primarily from the USDA Food Composition Database, whenever available, or otherwise other online calculators.
did you make this recipe?
Make sure to follow on Pinterest @nourishplate and on Instagram @nourishplate


Leave a Review!